
RVLock Class C/A PCB Installation
Edited
Installing A New PCB On An RVLock Charter:
Remove the three screws in the back portion of the lock.
Disconnect the red and white wires
Remove the battery compartment screws
Remove the 4 AA batteries
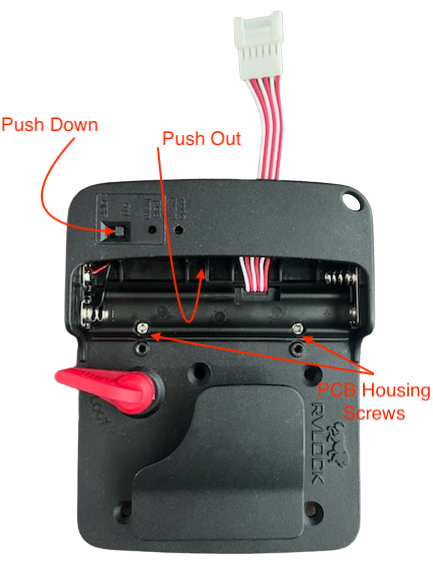
Remove the two PCB housing screws
While pushing the "ON/OFF" button down below the frame, push out on the battery compartment.
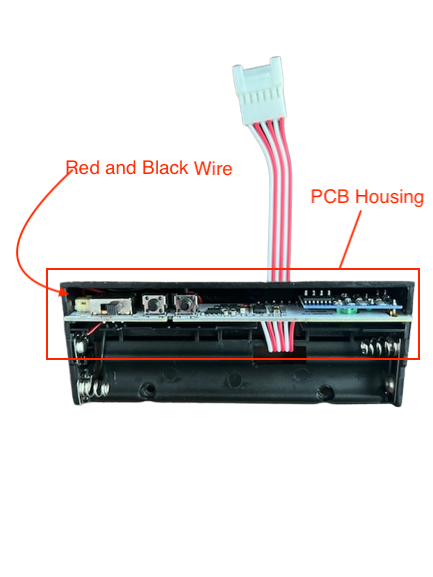
Remove PCB from housing
Disconnect the red and black wire
Connect he red and black wire to the new PCB
Insert PCB into housing
Replace the PCB cover
Tags: Circuitry, board, replacement PCB, Replacing PCB
v4
powerboard
pcb
install